
Recently, I created an Azure Automation Runbook used to integrate with ServiceNow and create DevOps projects and provision users from a service request. As part of the automation, I wanted to be able to either email the requestor upon success, or upon failure, email the support team with details of the issue. Setting up the webhook and passing the details needed wasn’t an issue. However, sending the email was becoming a bit perplexing. According to Microsoft’s documentation, the resolution is to utilize SendGrid. This may be the correct path for high volumes of email, but we’re talking about just a couple emails a week here. Not something that I need (or want) to provision a whole ‘nother resource for. I’ve sent emails via Graph API before, but always using an App Registration and Client Secret or Certificate for authentication. In this case, I wanted to use the System Managed Identity of the Automation Account so that I didn’t have to worry about a client secret that expired or a certificate that had to be renewed.
The Problem
Normally, when you view a typical App Registration, you can add whatever permissions you need and, if needed, grant admin consent.
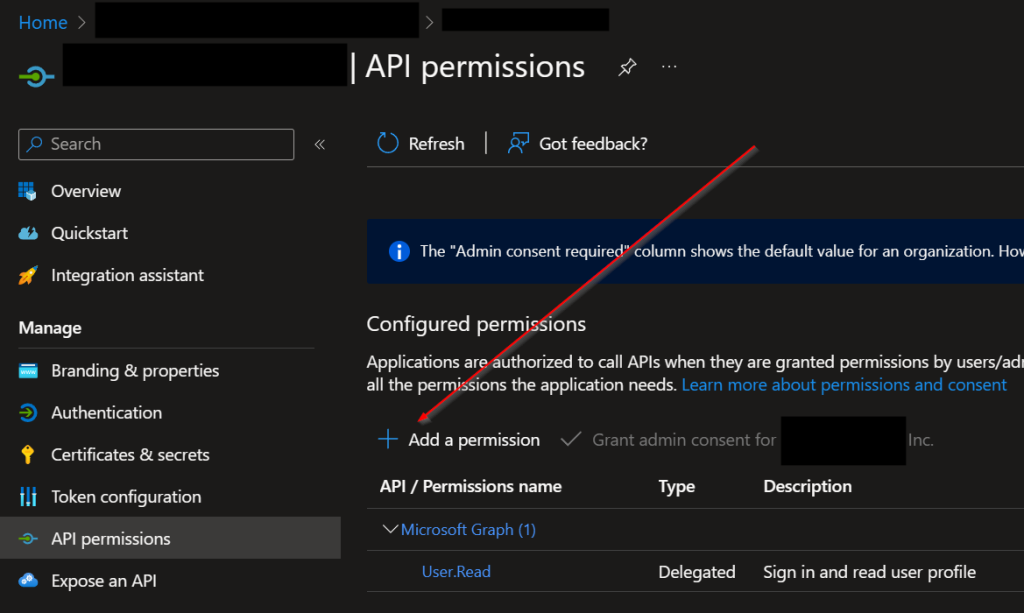
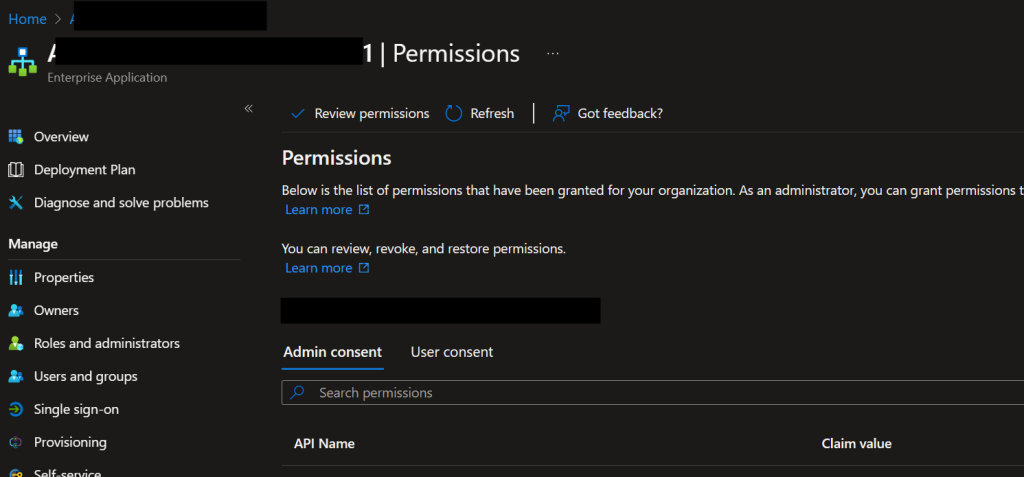
However, with a managed identity, there is no “+ Add a permission” button:
Solution
Interestingly enough, we can actually add permissions to a managed identity using PowerShell and the Az Module. First, navigate to the resource in question and click on Identity under the Account Settings heading.
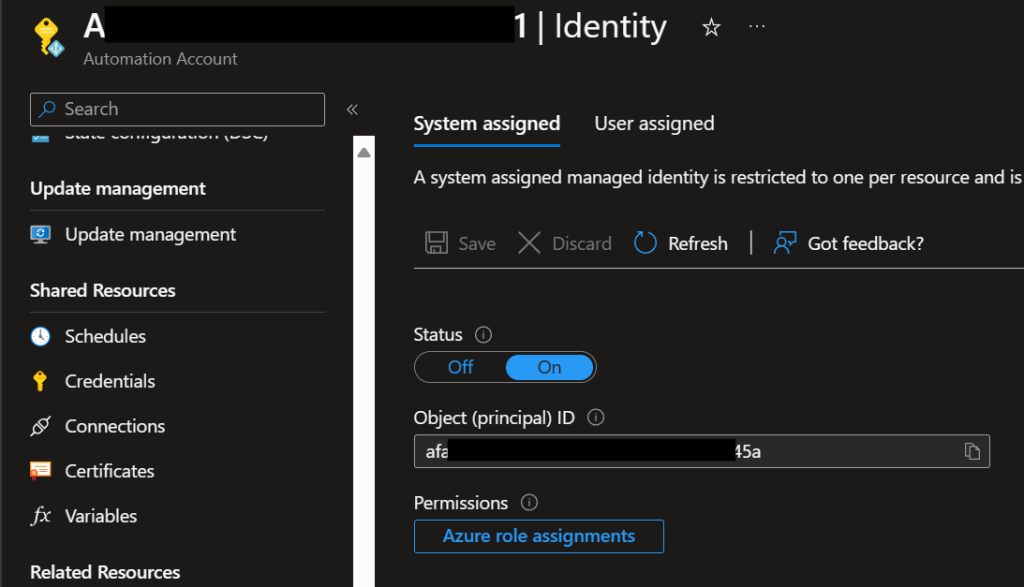
Copy/make note of the Object ID. Next, open up PowerShell and run the following commands:
#Make sure you have appropriate permissions to perform these actions
1> Connect-AzAccount

2> $Graph = Get-AzADServicePrincipal -Filter "DisplayName eq 'Microsoft Graph'"
If we output the value of the second command, we should get something like this:
3> $Graph
DisplayName     Id                                   AppId
-----------     --                                   -----
Microsoft Graph 1ecxxxxx-xxxx-xxxx-xxxx-xxxxxxxxxe46 00000003-0000-0000-c000-000000000000
The Id will be unique for your tenant, but the AppId should always be 00000003-0000-0000-c000-000000000000 (At least for Graph). Next, we need to pull a list of the Permission IDs that we want to grant to our Managed Identity. In our case, we are interested in Mail permissions, but you can adjust this filter (or omit it completely) to return permissions that tickle your fancy.
4> $Graph.AppRole | Where-Object {$_.value -like 'mail.*'} | Select-Object Value,Id

Value              Id
-----              --
Mail.Read          810cxxxx-xxxx-xxxx-xxxx-xxxxxxxx0d01
Mail.ReadBasic     6be1xxxx-xxxx-xxxx-xxxx-xxxxxxxx140a
Mail.ReadBasic.All 693cxxxx-xxxx-xxxx-xxxx-xxxxxxxx42ef
Mail.ReadWrite     e2a3xxxx-xxxx-xxxx-xxxx-xxxxxxxx86c9
Mail.Send          b633xxxx-xxxx-xxxx-xxxx-xxxxxxxx7e96
In my case, I just needed Mail.Send. Next, we’ll grant our application that Graph role:
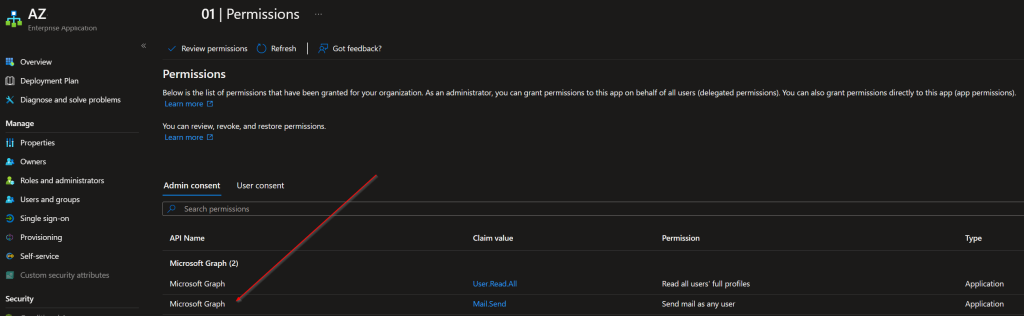
5> New-AzADServicePrincipalAppRoleAssignment -ServicePrincipalId afa1xxxx-xxxx-xxxx-xxxx-xxxxxxxx045a -AppRoleId b633xxxx-xxxx-xxxx-xxxx-xxxxxxxx7e96 -ResourceId 1ecxxxxx-xxxx-xxxx-xxxx-xxxxxxxxxe46For the parameters, the ServicePrincipalId is the ObjectId of the system managed identity. AppRoleId is the Id from the $Graph.AppRole shown in command 3 above. Finally, ResourceId is the ADServicePrincipalId for Graph shown in command 4. Once you run that command, you should be able to navigate to your application in Entra ID and enter the Object ID in the search box. From there, under Permissions from there, we should now see the permission(s) we just added.
Now, when we work in our Azure Automation Runbook, we can send email via Graph. Because we are running in an Application context, we need to specify the account that we are sending mail as. I would recommend setting up a shared mailbox and then limiting the access to just that mailbox in the M365 admin portal, but here’s the quick and dirty code to send an email using an Azure Automation Runbook.
#Connect to Azure with our System Managed Identity
Connect-AzAccount -Identity

#Get a GRAPH Token
$Token = Get-AzAccessToken -ResourceTypeName MSGraph

#Create Our Header
$Header = @{
  'Authorization' = "Bearer $($Token.Token)";
  'Content-Type' = 'application/json';
}

#Setup the Body
$Body = @"
  {
    "message": {
      "subject": "Test Email",
      "body": {
        "contentType": "HTML",
        "content": "This is the body of the email"
      },
      "toRecipients": [
        {
          "emailAddress": {
            "address": "[email protected]"
          }
        }
      ]
    },
    "saveToSentItems": false
  }
@"

#Send it
Invoke-RestMethod -Method Post -Headers $Header -Body $Body -Uri 'https://graph.microsoft.com/v1.0/users/[email protected]/sendMail'
Hopefully, this helps.